
- Conflict:
- First World War (1914-18)
- Service:
- Army
At the onset of 1917, soldiers on the Western Front wished for a better year than the last. Millions of soldiers on both sides had been killed, maimed, and captured on the battlefields of Verdun (21 February − 20 December 1916) and the Somme (1 July – 18 November 1916) but no end to the fighting was in sight. Australians had learnt what war meant in 1916. At Pozières (23 July – 3 September 1916) 23,000 men had become casualties in six weeks. Ninety kilometres to the north, at Fromelles, the 5th Division suffered 5,533 casualties in a single night, 19 July 1916.
Military leaders were understandably anxious to break the deadlock. Field Marshal Sir Douglas Haig, commander of the British Expeditionary Force, believed this could only be achieved on the Western Front. Haig was, and remains, a controversial figure. His attritional battle plans have been described as unimaginative and needlessly wasteful of lives. British Prime Minister David Lloyd George thought so, and longed to move the focus of the war away from the carnage of the Western Front. When he failed to achieve agreement for this at an inter-Allied conference in Rome, in January 1917, the prime minister sought instead to place British armies under the supreme command of French commanders, whom he considered more skilled than his own generals in minimising casualties and achieving battlefield success.
One French commander in particular impressed Lloyd George—the handsome, charismatic and articulate General Robert Nivelle. Nivelle’s plan called for a major French assault along the Aisne river valley supported by a series of diversionary attacks by the British further north at Arras. The French had honed their offensive tactics at Verdun and the Somme. Nivelle argued these could be employed en masse along a broad front, stretching from Reims to Roye, involving over one million troops and 7,000 guns. He promised to break the German lines within 48 hours.

Germany’s heavy losses in 1916, meanwhile, had prompted a strategic re-evaluation on their part. From September 1916, they had begun construction on a new defensive system, the Siegfriedstellung, stretching from Arras to Laffaux. The allies would know
it as the Hindenburg Line. In February 1917, the Germans withdrew east to this heavily fortified system of mutually supporting pillboxes and concrete bunkers. In doing so they shortened their frontier—economising on precious manpower—and engineered a vast killing-zone that would take a heavy toll on all subsequent allied assaults.
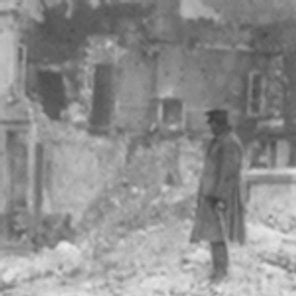
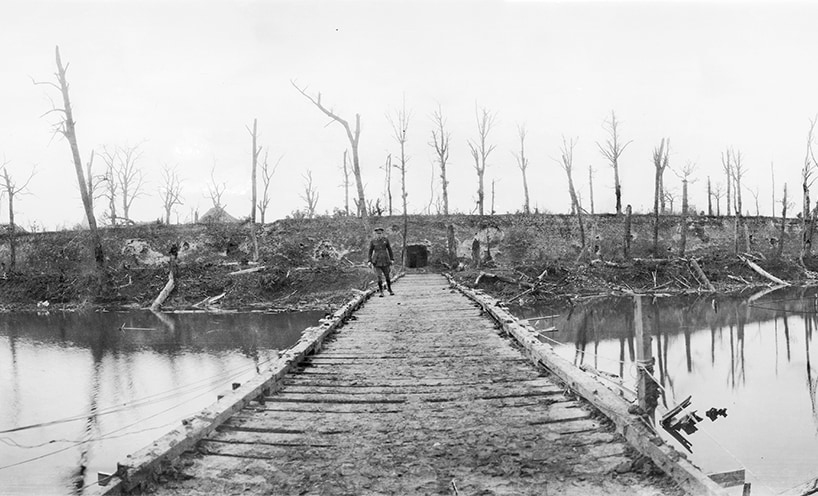
Allied elation at news of the German withdrawal was soon tempered by the knowledge that the enemy had greatly improved their strategic position. Australian soldiers moving into the previously enemy-held town of Bapaume, for example, encountered widespread destruction, poisoned wells, time-delayed bombs and other booby-traps. roads, bridges and railways had to be rebuilt and while some villages, like Vaulx-Vraucourt and Monchories, held by light German rear-guards, fell cheaply, stiffer resistance was encountered at Lagnicourt, Noreuil and Hermies. The men would not reach the Hindenburg Line until 9 April. Plans for the Nivelle Offensive—in development since December 1916—were seriously disrupted by the unexpected German withdrawal and further plagued by intelligence leaks. Before the offensive began, plans for it, and the supporting British attacks on Arras, were well understood by the Germans.
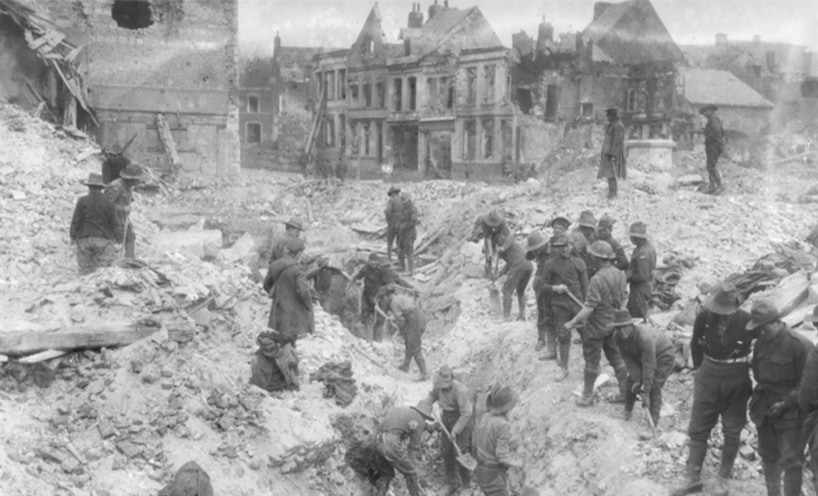
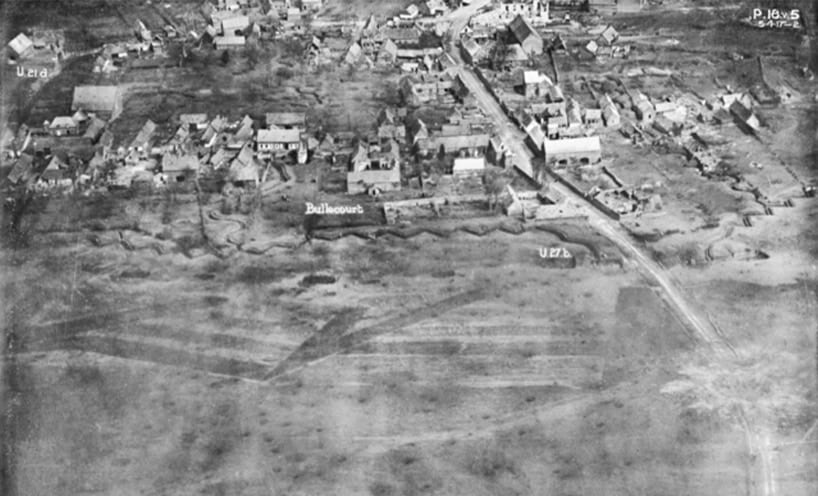
Before the French unleashed their great offensive, three British armies launched theirs. Canadian troops of the 1st British Army, to the north of Arras, captured the strategically important Vimy Ridge (9–12 April). The 3rd British Army, meanwhile, advancing from Arras astride the Scarpe river (9–14 April), accomplished the deepest penetration into enemy held territory since trench warfare began. Delays bringing heavy guns up to the front, however, stalled an attack by the 5th British Army against Bullecourt, a fortified village on the Hindenburg Line, south-east of Arras. The 5th Army’s impetuous commander, General Hubert Gough, was frustrated until he arrived at what he thought was a solution—tanks. Tanks had been used for the first time only six months before, and with mixed results. Tank Advocates claimed they would provide cover, cut barbed-wire, and demoralise enemy soldiers—fulfilling all the roles of a traditional artillery barrage. Gough planned to use twelve tanks and troops of the 4th Australian Division to seize Bullecourt. The bold plan, its rapid formulation, and its reliance on a new and unreliable technology, was met with misgiving by Lieutenant-General William Birdwood, commander of I ANZAC Corps. The attack went ahead, regardless.
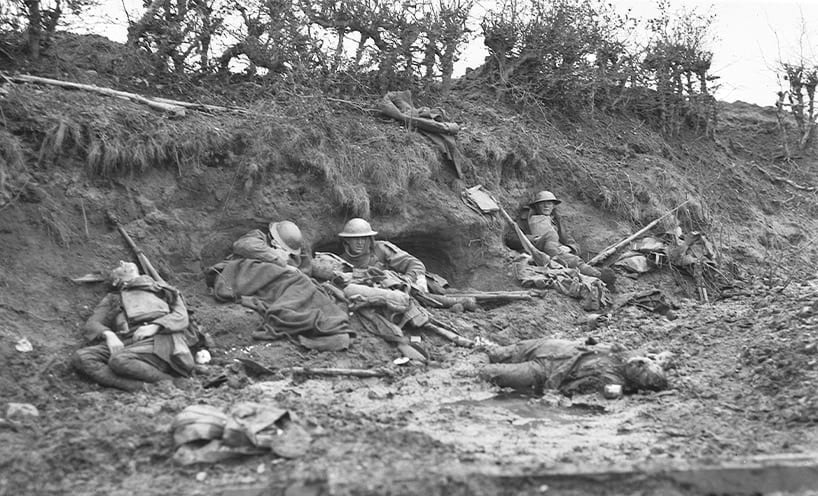
The First Battle of Bullecourt began at 4.30am on 11 April. Two brigades of the 4th Division, the 4th and the 12th, were selected for the assault. Australians, who had never fought alongside tanks before, learnt they were too slow and unreliable to perform as promised. The tanks stalled, one by one, but Australian troops surged forward, seizing their first objectives, despite the vast belts of intact barbed wire. By 7.00am Australian troops held a section of the Hindenburg Line. Australian field commanders requested an artillery barrage be laid down around their positions to deter German counter-attacks. The requested shelling, however, did not eventuate. The troops instead endured enfilading enemy fire, from Bullecourt to their left and Quéant on their right, all the while fighting off ferocious enemy counter-attacks.
The men of the 4th Brigade, realising they were trapped, defied the maelstrom and withdrew across no-man’s land amid desperate cries of ‘every man for himself.’ Most never made it. From an establishment of 3,000 men the brigade suffered 2,339 casualties. One of its units, the Victorian 14th Battalion, lost 19 officers and 582 other ranks. The 12th Brigade remained in the field another hour before it broke having suffered 950 casualties. A staggering 1,170 men had been taken prisoner—the largest number of Australians captured in a single engagement during the entire war. Official historian Charles Bean’s assessment of Gough’s battle plan was blunt: ‘everyone was aware that the 4th Australian Division had been employed in an experiment of extreme rashness.’
Across the Arras battlefront, early British successes began to stall in the face of effective enemy resistance and the immense logistical effort required keeping three British armies in the field. When the Nivelle Offensive was launched on 16 April 1917 it achieved considerable tactical success but the German lines held and French casualties mounted. The offensive was suspended on 25 April. Attempts to renew the offensive on 3 May resulted in widespread mutinies among French troops. The discredited Nivelle was dismissed on 15 May and replaced by General Philippe Pétain who quickly restored order. The Germans never learnt of the mutinies and France survived.
On 3 May 1917 soldiers of the 2nd Australian Division began advancing over the same ground at Bullecourt that had proved so costly to the 4th Division on 11 April. Screened by a creeping barrage, rather than unreliable tanks, the Australians made better progress. By dusk they had seized and cleared a 400 metre-long stretch in the first two lines of enemy trenches. 1st Australian Division troops relieved their 2nd Division comrades on 4 May, and pushing out along the trenches, extended their narrow foothold on the Hindenburg Line. When the Germans launched a mighty counter-attack at dawn on 6 May the Australians held firm. Corporal Arthur of the 6th Battalion (VIC) noted: ‘The fields are covered with dead, thick as leaves from the trees, and still the wonderful larks sing, blind to our terrors.’ The 5th Australian Division repulsed a final German counter-attack on 15 May. The Germans now abandoned this section of the Hindenburg Line to the allies. Charles Bean later wrote that this battle was ‘...in some way the stoutest achievement of the Australian soldier in France, carried through against the stubbornest enemy that ever faced him there.’ Seven thousand Australian casualties attested to this fact.
The failure of the Nivelle Offensive left Haig free to pursue the offensive he’d always wanted—not in France, but in Belgium. In the early hours of 7 June 1917, nineteen enormous mines obliterated German positions atop the Messines ridge, in Flanders. The German front line and 10,000 enemy soldiers were literally blown to pieces. Within hours British, Australian and New Zealand infantry had advanced three kilometres behind a carefully co-ordinated artillery bombardment, securing all their objectives. Of Hill 60, the site of one of the greatest explosions, Official Photographer Frank Hurley would record:
...everywhere the ground is littered with bits of guns, bayonets, shells and men. Oh, the frightfulness of it all. Until my dying day I shall never forget.
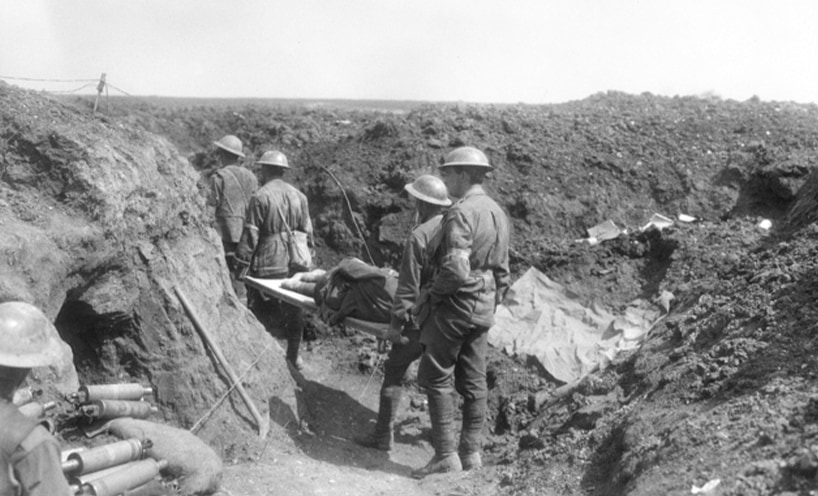
The Battle of Messines (7–14 June 1917) was followed by the Third Battle of Ypres (31 July – 10 November 1917), a collective name for a series of battles aimed at capturing the Gheluvet Plateau. In spite of its auspicious prelude, the campaign would come to be viewed with abject horror by all who took part in it—surpassing in the minds of many, even the dreaded Somme. British Empire casualties eventually exceeded 310,000. Australian casualties surpassed 38,000, with 11,200 deaths. In October alone 19,914 Australians fell—the bloodiest month in Australian military history. The Australians performed admirably at Ypres in the battles of Menin Road (20–25 September), Polygon Wood (26 September – 3 October) and Broodseinde (4 October) but the losses were sickeningly heavy. It was, however, the final, appalling, phase of the campaign fought at a small Belgian village that would horrify the entire British Empire. Passchendaele has become, like the Somme, a chilling byword for war’s waste.
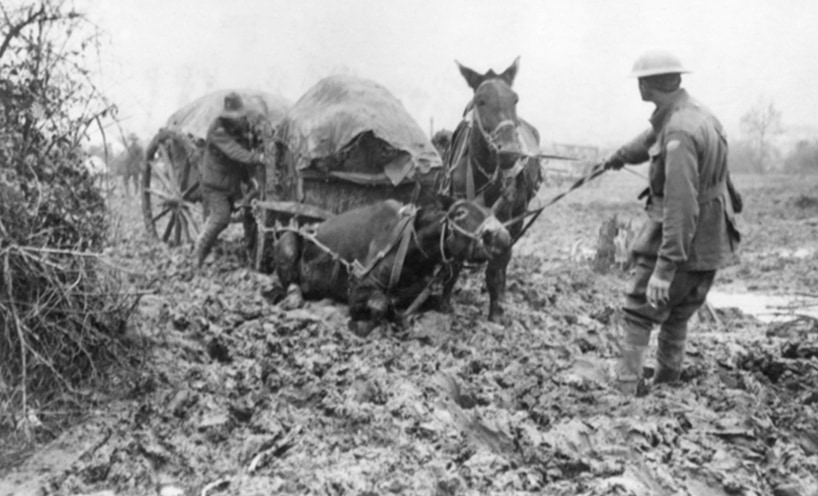
The First Battle of Passchendaele (12 October) was a bloody baptism for the newest Australian arrival on the Western Front, the 3rd Division. The fledgling formation lost 3,200 casualties, 62 percent of the men committed, in mere hours. It was not simply high casualties that made Ypres and Passchendaele so awful. Large parts of the battlefield were swamp or reclaimed swamp. Shelling turned the battlefield into a quagmire. Mud, an issue on most Western Front battlefields, presented a near impassable obstacle at Passchendaele. The commander of the division, Major General John Monash, wrote home explaining what the men had faced:
Considerable rain began to set in on 6 October. The weather grew steadily worse on 10 and 11 October. There was no flying and no photographing, no definite information of the German redisposition, no effective bombardment, no opportunity for replenishing our ammunition dumps; and the whole of the country from Zonnebeke forward to the limits of our previous captures were literally a sea of mud, in most places waist deep.
Occupying higher ground from which water would drain, the Germans had only to sit tight and endure prevailing conditions—they did not have to move their guns or advance over the deadly mud. The German commander in Flanders, Crown Prince Rupprecht wrote in his diary ‘Most fortunate rain, our most effective ally.’ The Australian advance floundered in the mud and the men fell alongside comrades of the New Zealand Division. Passchendaele would eventually fall to the Canadians, but at a predictably Pyrrhic cost.
Anglo-French failures on the Western Front in 1917 placed enormous pressure on their beleaguered allies, Italy and Russia. Germany’s position, meanwhile, was sufficiently secure to send reinforcements to aid the Austro-Hungarians on the Italian and Russian fronts. Italy survived a calamitous defeat at Caporetto (24 October – 19 November 1917) but Russia’s war effort did not survive the year. A Bolshevik revolution in November was followed by a negotiated peace with Germany in March 1918. The close of 1917 offered some cause for hope. Tanks, so disappointing at Bullecourt, hinted at their future war-winning potential at Cambrai (20 November – 7 December 1917) when 476 advanced eight kilometres in six hours, a greater advance than had been achieved in three months at Ypres. The first American troops, meanwhile, began arriving in Europe, a trickle that would soon become a flood. In Palestine, Australian Light Horsemen, led British soldiers into Jerusalem—General Edmund Allenby’s ‘Christmas gift to the Empire.’ After the horrors of Bullecourt and Passchendaele, it was welcome news indeed.
Author
Neil Sharkey has been the Exhibitions Curator at the Shrine of Remembrance since January 2007. In that time he has developed the Shrine’s Second World War Gallery and dozens of temporary exhibitions, including Passchendaele: the Australian and New Zealand Experience (2007) and The Blood Tub: Australians at Bullecourt 1917 (2017).
Updated