

- Conflict:
- First World War (1914-18)
- Service:
- Army
In mid-September 1918, the First World War was looking up for the grand alliance that was arrayed against the Central Powers of Germany, Austria-Hungary, Bulgaria and the Ottoman Empire. On the Western Front, the last of the German Spring Offensives had been easily blunted in mid-July, and within a few days, the French began to turn the tide with the massive successful attack that became known as the Second Battle of the Marne. On 8 August, two British and French armies attacked side by side at Amiens-Montdidier, starting the so-called 100-days, a rolling general offensive coordinated by Marshal of France Ferdinand Foch that would end only with Germany’s capitulation in early November.
While the events in France and Belgium during these months attract a great deal of attention, there were dramatic events on other fronts too. In Italy, Greece (Salonika) and the Middle East, allied victories helped bring the war to an end by ensuring the Central Powers’ faced a steadily deteriorating situation through that autumn. Defeats on the battlefield, combined with tumult at home and within their armies, led to the erosion of any sense of hope.
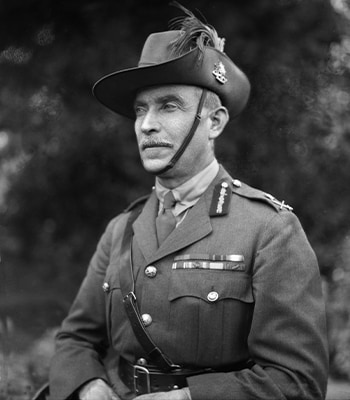
As Germany’s coalition fell apart these events helped ensure Berlin could not fight on. In this situation, in Palestine, General Sir Edmund Allenby’s Egyptian Expeditionary Force (EEF) undertook a remarkable offensive that September which led to an advance of more than 500 kilometres in a little over a month. This astonishing victory, in which the Australian Light Horse regiments took part, destroyed three Ottoman armies and dramatically reshaped the Middle East.
This offensive, known to Anglophones as the Battle of Megiddo, was followed by the rapid advance into Syria that seized Damascus and culminated at Aleppo on the frontier with Anatolia, has long been characterised as a great cavalry victory. There is some justification for this as Allenby’s mounted troops, capable of long ranged operations of great rapidity, led the advance and gave the fighting its unique character. History is never that straightforward, however. Despite the prominent role of the horsemen, Allenby’s victory depended on the EEF’s general superiority and ability to fight an effective all-arms battle, the exhaustion and failure of the Ottoman forces opposite them and on the influence of events beyond Palestine and Syria.
In mid-1918, the EEF was occupying positions it had largely been holding since the end of the previous year. The great British offensive that had started at Third Gaza-Beersheba in late October 1917 petered out in central Palestine in December. On the coast, the new front line had stabilised just north of the small port town of Jaffa (now part of Tel Aviv). It ran eastwards towards Jerusalem, which the British had taken in December 1917. After resting over the winter, the EEF had extended the line into the Jordan Valley in February 1918, before two forays across the Jordan in March and April.
Both these operations were failures, something partly tidied up by labelling them ‘raids’ afterwards—the Amman and Es Salt raids.

These last operations, particularly the Es Salt operation in April, had been affected very much by events outside Palestine, that being the onslaught of the German Spring Offensives on the Western Front. The sense of crisis this engendered, along with the very serious losses the British suffered in France and Belgium, meant that the EEF was called upon to fulfil the role of strategic reserve and it was stripped of manpower to provide reinforcements for France. Allenby lost the bulk of his by now very experienced British troops as they crossed to France. The shortfall was made good with Indian troops, but the incoming infantry reinforcements were almost all untrained recruits. It would take time to bring them and their units up to standard.
The result of this was twofold. In the first instance, the EEF’s character changed considerably. It had always been a very polyglot and ‘imperial’ army, made up of troops from the British Isles, the multitudes of India, Australasia and the Far East. It now became a predominantly Indian army, but at the same time, more varied than ever as Jewish battalions of the Royal Fusiliers were incorporated, along with troops from the West Indies. Second, the need to train the infantry meant that large scale operations would have to wait.
The situation was much better for Allenby’s mounted troops, organised as the Desert Mounted Corps under their Australian commander, Lieutenant-General Sir Harry Chauvel. While he had lost most of his experienced British yeomanry, they were replaced by very good Indian regular regiments redeployed from France, and his highly regarded New Zealand Mounted rifles and Australian Light Horse units remained at his disposal. The latter even underwent a modest expansion mid-year with the creation of the 5th Light Horse Brigade following the freeing up of more Australian troops through the disbandment of most of the Imperial Camel Corps.
Indeed, Chauvel’s corps, the largest cavalry formation in British military history, went into the autumn with four full strength divisions made up of very high-quality troops. The Australians were the corps’ largest single nationality, but only just, with the number of Indian regiments only slightly fewer. The inclusion of a mixed French colonial regiment meant it also included both European and Arab troops from North Africa.
The Desert Mounted Corps was the EEF’s most experienced, professional and accomplished corps, but the two infantry corps and other parts of the EEF, despite the mass of new troops, also had considerable experience in the theatre and competent commanders. Hence the EEF was well positioned to fight successfully when it was ready.
As the army trained, Allenby, and his officers, planned. While the Third Gaza-Beersheba operation had been successful in 1917, it had not come off as Allenby had hoped. His scheme for a cavalry thrust behind Gaza to entrap the Ottoman garrison there had failed in the face of strong resistance and a lack of water to sustain the mounted troops on the inland flank. Despite this, he adopted a similar scheme for his coming offensive with some important variations. First, the bulk of the mounted troops would not be used during the initial assault but would be kept ready to exploit a breakthrough. Second, the cavalry exploitation would be launched by the coast with its more open terrain, better roads and proximity to coastal ports.
As the scheme evolved the intention was to concentrate the EEF’s guns and the bulk of the infantry into an attack by XXI Corps against the brittle Ottoman lines by the coast. Utilising the latest combined arms infantry and artillery tactics in use on the Western Front, this attack would then swing eastwards, trapping the Ottoman defenders in Palestine in a ‘sack’ against the Jordan river. This sack would then be closed to the north by Chauvel’s cavalry divisions as they drove north and then east. Subsidiary attacks by a mixed force under New Zealand’s Major-General Sir Edward Chaytor (Chaytor Force) would strike towards Amman and seal off crossings across the Jordan, tightening the sack further. The Ottoman Army opposite had a similar strength to the EEF but was lacking in logistic support, suffering from poor health services and arrayed in old-fashioned 1915-style linear defences that were to prove inadequate when the British attacked.
Thus, on 19 September, the massed guns of the EEF opened a withering concentration against the Ottoman troops near the coast and the infantry soon went forward behind creeping barrages. Though the defenders fought hard in some places, the infantry assault was entirely successful in driving the Ottoman troops back and eastwards.
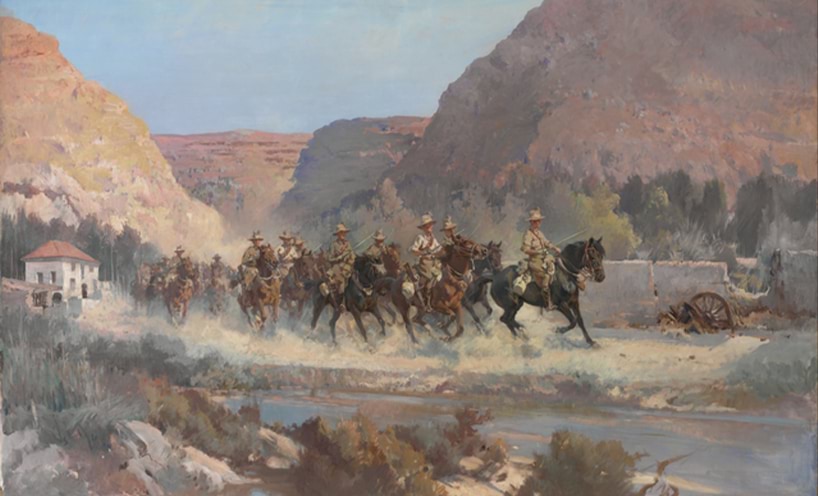
In the air, the Royal Air Force (including No 1 Squadron, Australian Flying Corps) struck at Ottoman communications, reported on the enemy’s movements and attacked troops on the ground. The British and Indian 4th and 5th Cavalry Divisions, called forward by liaison officers attached to the infantry headquarters, soon swept through the gap and began their headlong advance, northwards. The Australian Mounted Division, recently re-equipped and trained to use swords (which they frequently used to good effect in the coming weeks), followed.
The leftmost 5th Cavalry Division rode 80 kilometres in 24 hours to take the Ottoman headquarters in Nazareth early on 20 September. General Liman von Sanders, commanding the Ottoman forces in Palestine, was forced to escape by car and lost communication with his troops.
In the meantime, the 4th Cavalry Division, to the right of the 5th, took the vital Musmus Pass, swept across the Plain of Esdraelon and took its objective, Afule, early on 20 September. It then pushed on to take Beisan, overlooking the Jordan, later that day. It had covered 130 kilometres in 36 hours and completed the entrapment of the enemy.
The Australian Mounted Division, after following the 4th Cavalry Division through the Musmus Pass, swung eastwards whereupon it captured a mass of enemy equipment and disorganised troops at Jenin. Meanwhile Chaytor Force, which included the Anzac Mounted Division, had taken Amman.
The overall attack had been a stunning success and in a few days, the EEF had destroyed the two Ottoman armies in northern Palestine (the Seventh and Eighth) and the enemy Fourth Army was in flight from Amman, headed north for Damascus along the railway line between the two.
Allenby had the same objective in mind and after a brief pause to consolidate, the Australians were pushed on to take Semakh and Tiberias on 25 September, which effectively brought the Battle of Megiddo to an end. The advance soon continued, however. On 27 September, the 3rd and 5th Light Horse Brigades crossed the Jordan north of Lake Tiberias and were soon in action against Ottoman/German rear guards on the road to Damascus. Further east the 4th Cavalry Division, supported by the Arab Northern Army, was also advancing on Damascus from the south, in pursuit of the Ottoman Fourth Army.
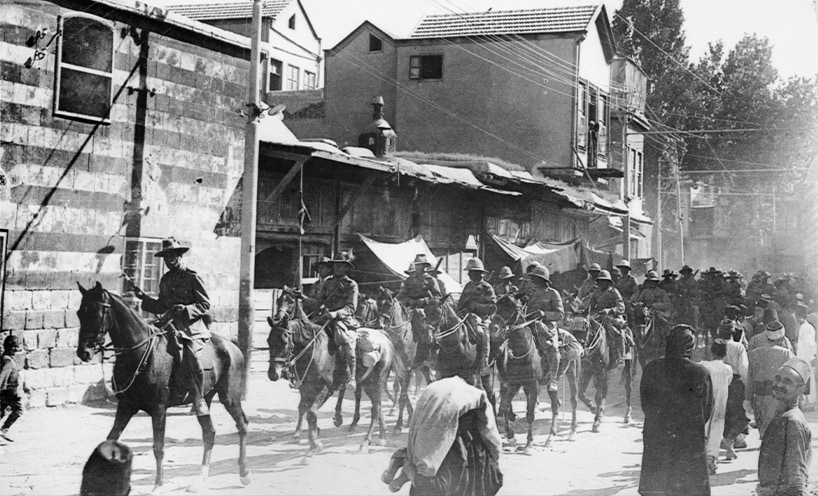
The Australian Mounted Division fought a series of minor actions along the road to Damascus and on 30 September, closed the Damascus-Beirut road by firing on the Ottoman troops in the Barada Gorge. On the same day, the remnants of the Ottoman Fourth Army were caught just short of Damascus by the 4th and 5th Cavalry Divisions and the Arab Northern Army. Damascus was open and on the morning of 1 October the leading Australian troops, the 10th Light Horse regiment, followed later by British/Indian and then Arab forces, passed through the city to secure positions on the northern approaches.
The Ottoman position in Palestine and now Syria was in ruins and the EEF’s 5th Cavalry Division, supported by the 4th, continued northwards for a further 300 kilometres to take Aleppo, and its strategically important railway junction, on 26 October. Exhausted by the advance and beset with malaria, the EEF’s mounted troops were finally halted by an Ottoman force just beyond the town. The Australian Mounted Division was called forward from Damascus, but by now the war was coming to an end.
On the Western Front the Allies continued to drive the Germans back. In mid-September, the Allies had also attacked at Salonika in Greece, where the weakened and hard-pressed Bulgarian Army soon collapsed. Bulgaria left the war on 30 September, breaking the land bridge between the Central Powers. The Franco-Serbian army then drove north through the Balkans and by early November threatened Austria-Hungary from the south-east. In combination with a defeat on the Italian front, Austria-Hungary was forced to surrender and throw open its borders to the Allies, a development they intended to use to attack Germany from the south.
In the meantime, the British-Greek forces had driven east from Salonika and soon threatened Constantinople from the west, where the Ottoman Empire had few troops. On top of the collapse in the Middle East, and of Bulgaria, this was the last straw and on 30 October the Ottomans signed the Armistice of Mudros, which brought the Palestine Campaign to a close.
For the Australian troops in the Middle East, Megiddo and the subsequent exploitation to Damascus and beyond was the last fighting of the war and a genuinely remarkable military achievement. While the Battle of Beersheba is most remembered in Australia today, for many of the officers and men who fought in this theatre, the astounding last few weeks of the war, which crowned the whole campaign, was the episode they thought was their greatest accomplishment.
Author:
Dr Jean Bou is a Senior Lecturer at the Strategic and Defence Studies Centre at Australian National University. Previously a historian at the Australian War Memorial, he has published extensively on the Light Horse and the Australian Imperial Force’s Sinai-Palestine Campaign.
Updated